Archive for the ‘Colors’ Category
Number One and Cirlces
Sep
Our number again was the number one. I pick a number to concentrate on for two weeks because it seems like it’s a little harder for Hailey to recognize her numbers than her letters.

We used Legos to make the number 1.

I wrote the number 1 on post it notes and stuck them all over Hailey’s playroom and our family room. Hailey had a blast finding the numbers and then sticking them all over the place again.
Our shape is still the circle as I am only doing one shape each month. Hailey actually knows all of her basic shapes, so I may need to rethink my plan and start teaching her some of the harder shapes.

Hailey looked around her playroom for various toys shaped like a circle.
We made a circle sun-catcher.

Here’s what you’ll need: clear contact paper, marker, scissors, something to draw a big circle with, circles cut out of tissue paper in varying sizes.

Draw a circle onto the contact paper and then remove the backing. Put contact paper on the table (I taped it down so that it wouldn’t get stuck on Hailey’s arm) then add tissue paper circles. I also left the contact paper as a square so that when I added the other piece of contact paper I wouldn’t have to try to line up the circles. Then after I put the other piece of contact paper on it was very easy to just cut out the circle shape.

Hang your circle sun-catcher on the window.
We also painted using red- our color of the month (another idea I may need to rethink as Hailey knows all of her basic colors) but I posted about that on Monday with our letter of the week.
One Red Circle
Sep
This post is not actually about one red circle. Rather it is about the number, color and shape Hailey was learning about last week.
Our number was the number one (we will do a new number every other week). Here is one of the projects we did to reinforce the number one.

Here’s what you’ll need: a large number one on construction paper, a blank piece of construction paper in a different color, paint and a sponge.

Sponge paint the number one. Notice the look of concentration on Hailey’s face- this was serious work!

After the 1 dried, I cut it out and glued it onto the other piece of construction paper. Then I wrote “one” and we added one sticker. This is hanging on what will be our number wall in Hailey’s playroom.
Our color for the month of September is red. We did a couple of projects last week for the color red.

We made a red discovery bottle- it has water and red food coloring in it. And here you can see Hailey adding some glitter. Then I used a hot glue gun to glue the top on and added a label that says “Red” on the side of the bottle.
Then we made a red collage:

Here’s what you’ll need: a bunch of red stuff and some glue.

First Hailey colored the red paper using a red marker, crayon and colored pencil and used a red stamper as well.

Then Hailey ripped apart a different piece of red paper. (Great for those important little hand muscles.)

Glue all of the red items onto the red paper.

The finished red collage.
Lastly, our shape for the month of September is circles. We made a circle painting.

Here’s what you’ll need: construction paper, paint, various items shaped like circles to use as stampers (I used the tops from milk containers, the top of a lays tube, and an empty toilet paper roll).

Dip the circles into the paint and then stamp onto the paper.

The finished circle picture.
More Caterpillar Fun
Aug
Since we are watching our caterpillars turn into butterflies I have been doing several caterpillar activities with Hailey. Yesterday you got to see our Egg Carton Caterpillar and today I’m showing you how we wrote Hailey’s name for this fun craft.

Here’s what you’ll need: Several different colors of construction paper, something to draw a circle with (I used the Pringles container), scissors, marker, glue, items to use for eyes, nose, mouth and antenna on your caterpillar.

Cut out enough circles to have one for each letter in your child’s name and an extra one for the head of the caterpillar. Keep the green piece whole for the background.

Write your child’s name on the circles, leaving one circle for the head.

Glue the letters on, add the face and decorate it.

Here is the finished caterpillar (with some legs drawn on).
April Ideas
Apr
I try to do other things with Hailey, besides the crafts that I take pictures of to share here. So, I thought I’d give a brief summary of the non-craft activities we have done or that I plan to do with Hailey this month.
- I created cards with pictures of adult and baby animals on them. Then we matched up the babies with their mommies.
- We are going to plant some grass seed and take pictures as it grows. (It’s still been a little bit chilly here, but hopefully we can start this in the next couple of weeks.)
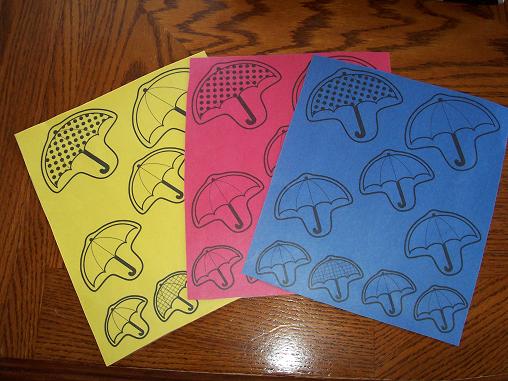
- Play matching and sorting games with these umbrellas.
- I have a Randy the Raindrop story that I am going to use on a flannel board (that I still need to make). I’ll take pictures of it when I actually do it.
- Make dice with farm animals on them. Then sing “Old MacDonald” and roll the die to see which animal we will use for that verse.
- Raindrop writing- practice the letters in Hailey’s name using these raindrops. The reason the raindrops are white is that is the color I am focusing on this month.

That’s all for now. I’ll be back to share more ideas as I come up with them.
Tags: activities for april, farm animal activities, free toddler activities, matching, sorting, srping activities
